Learn G-Code Part 2/2:
Advanced CNC programming
In the first part of the series „CNC programming: Learn G-code - Quick and easy“ we learnt the basics of G-code. In this article, you will learn more commands such as subroutines, loops, IF statements and R parameters.
MotivationIn CNC manufacturing, it is often necessary to produce similar parts with slight variations. Creating a new G-code file for every small change using CAD/CAM software can be time-consuming. A good solution is to use a customisable G-code file. With parameters, changes in the G-code file can be implemented quickly and easily, which saves time and increases flexibility. In this article, you will learn how parameterised G-code programming makes your CNC processes more efficient.
For CNC programming (G-code), we use our CNC control software as a free G-code simulator. Click here here, to download cncGraF for free.
To find out more about the free G-Code Simulator, click on the blog article
„cncGraF: Free G-code simulator and CNC machine emulator„.
Overview: Advanced CNC programming
G-Code: Subroutines
First, we add a subroutine. We will use the G-code example from the first part of this series „CNC programming: Learn G-code - Quick and easy„. The extended G-code lines are colour-coded in Light red highlighted. The G-code then looks like this:
; G-code file: Production of a rectangle on 22/12/2023
; Update on 23.01.2024
; Tool number 1 is selected
T1
; Lift the tool at rapid speed to the height Z = 10 mm above the zero point
G00 Z10
; Move to position X = 10 and Y = 10 at rapid speed
G00 X10 Y10
; Switch on the work spindle with M3 at a speed of 2000 rpm
M3 S20000
; Wait 5 seconds until the spindle speed is reached
G04 H5
; Relative dimensioning (chain dimension), Command G91 is active
G91
P1 ; Subprogramme 1 is called up
; End of programme
M5 M30
; Start of sub-programme 1
M99 P1
; Move to the centre of the rectangle
G00 X50 Y30
; plunge 2 mm into the workpiece at a feed rate of 600 mm per minute
G01 Z-12 F600
; Circle (d=20mm, centre 60×60) clockwise
; travelling at a feed rate of 600 mm per minute
G02 I0 J20
; Lift tool at rapid speed : Z = 10mm above the zero point
G00 Z12
; Move to position X = 10 and Y = 10 at rapid speed
G00 X-50 Y-30
; plunge 2 mm into the workpiece at a feed rate of 600 mm per minute
G01 Z-12
; Traverse rectangle 100×100 mm at a feed rate of 600 mm per minute
G01 X100
G01 Y100
G01 X-100
G01 Y-100
; Lift tool at rapid speed : Z = 10mm above the zero point
G00 Z12
M99 ; End of sub-programme 1
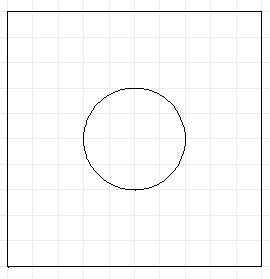
The G-code (see above) describes the processing of a rectangle and a circle, whereby the two shapes are described in the sub-programme 1 are defined. The sub-programme is started with the command P1 in the main programme.
The definition of the sub-programme begins with the command M99 P1 and ends with M99. All subroutines are located at the end of the main programme, i.e. after the command M30, which marks the end of the main programme. The number of the sub-programme is indicated by the number after ‚P‚ labelled - in this case 1.
G-code subroutines have the following structure:
G91 ; Relative dimensioning (incremental dimension) is activated
; Main programme
P1 ; Subprogramme 1 is called up
; Main programme
M30 ; End of the main programme
M99 P1
; Contents of the sub-programme 1
M99
![]() Note: Please note that at the beginning of the main programme the command G91 must be set to activate relative dimensioning (incremental dimension). All subsequent coordinate specifications are therefore relative values. This is necessary so that the sub-programmes can be placed at any position.
Note: Please note that at the beginning of the main programme the command G91 must be set to activate relative dimensioning (incremental dimension). All subsequent coordinate specifications are therefore relative values. This is necessary so that the sub-programmes can be placed at any position.
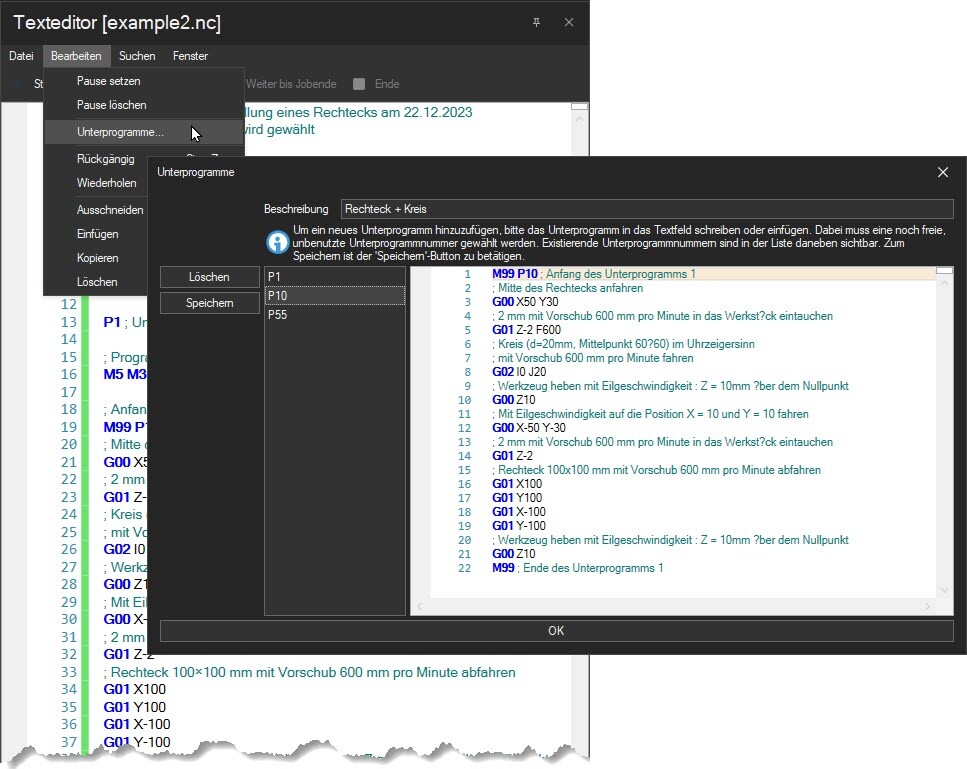
Sub-programme management
The CNC control software cncGraF has an integrated sub-programme management function. All subroutines can be saved there. In such a case, the subroutine does not have to be contained in the G-code file; instead, the subroutine is only called in the main programme with the G-code command ‚P‚ and the sub-programme number (here P1).
![]() Note: If a sub-programme with the same sub-programme number (the number after ‚P‚) is present both in the G-code file and in the subroutine management, the subroutine from the G-code file is used. The software first searches for the subroutine in the file and only then in the G-code management. This makes it possible to ‚overwrite‘ the subroutine in the administration.
Note: If a sub-programme with the same sub-programme number (the number after ‚P‚) is present both in the G-code file and in the subroutine management, the subroutine from the G-code file is used. The software first searches for the subroutine in the file and only then in the G-code management. This makes it possible to ‚overwrite‘ the subroutine in the administration.
G-Code: Loops
To duplicate the shapes defined in the subroutine, the subroutine must be called several times. This is done with the G-code commands G25 Q and G26 realised for loops.
The G-code section in the main programme then looks as follows:
G25 Q4
P1 ; Subprogramme 1 is called up
G00 X110
G26
With G25 Q and G26 a loop is programmed. G25 defines the start of the loop, and with G26 the loop is ended. The parameter Q defines the number of runs. In our example 4 runs are defined. After each sub-programme call, there is a relative position shift in X for the next sub-programme with the line: G00 X110.
What is an R parameter?
An R parameter is a placeholder (variable) in the range from R1 to R999 in which a value is saved. Example: R10 = 99.567. This line defines the parameter R10, which represents the value 99.567 contains.
By calling the R parameter (here R10), its value can be accessed in the G code. Please note the following when using the R parameters:
- Basic arithmetic operations Addition, subtraction, multiplication and division can be executed within a parameter. When calculating the values, the rule „Dot before dash“ is applied. The brackets are not supported.
Example:
R56 = 10/2 - 2*2
The result is 1 - R parameters can be used within the calculation.
Example:
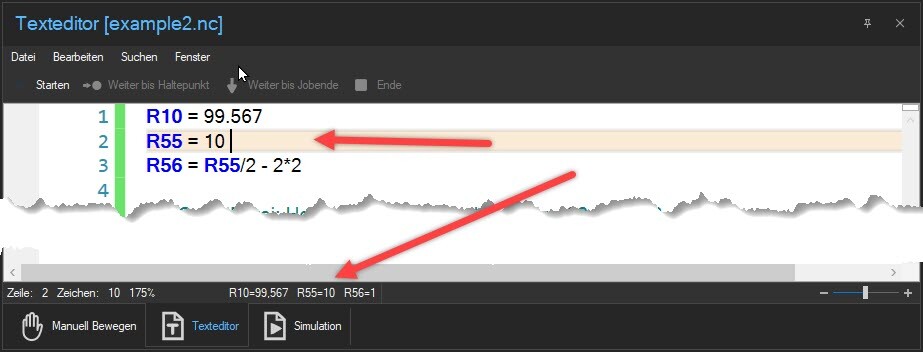
R55 = 10
R56 = R55/2 - 2*2
The result is 1 - R parameters can be assigned in the following places in the G code:
Command G00, example G00 X=R10
Command G01, example G01 X=R10 Y=R11 + 6 / 2
Command G02/G03 X/Y (arc commands), example: G02 I20 J20 X=R10 Y=R10
Command G25 Q (loop), example: G25 Q=R4
Command G53-G60 X/Y/Z, example G54 X=R20
IF statement command, example: $IF R100==1 - R parameters are global parameters, i.e. if they are defined at the beginning of the G-code file, they are available for the entire file.
- R parameters can also be used in sub-programmes.
- The values of the R parameters are displayed at the bottom of the status bar of the text editor (see screenshot below)
In the following, we add parameters to our loop. The G-code snippet then looks like this in the main programme:
R4=4 ; R4 Parameter (placeholder) with the value 4 as the number of passes create
R5=110 ; R5 parameter (placeholder) with the value 110 for new X position of the sub-programme
; Assignment of the value via parameter R4
G25 Q=R4
P1 ; Subprogramme 1 is called up
G00 X=R5 ; Relative displacement, defined in the R5 parameter
G26
What is an IF statement?
The IF statement is used to check a condition. If this condition is fulfilled, the commands within the condition are executed. The following operations are available:
equal ==
unequal !=
greater than or equal to >=
less than or equal to <=
The IF statement consists of the following commands $IF $ENDIF $ELSE $ELSEIF. The IF statement must stand alone in the line. IF statement can be contained in the main programme and in the sub-programme.
Example 1: $IF $ENDIF
R57=10 ; Create parameter R57 (placeholder) with the value 10
$IF R57== 10
; This G-code content is executed because parameter R57 has the value 10 (equals is fulfilled)
$ENDIF
Example 2: $IF $ELSEIF $ENDIF
R57=9
$IF R57<=9
; This content is executed because parameter R57=9 (less than or equal to is fulfilled)
$ELSEIF R57>=10
; This content is NOT executed because parameter R57 has the value 9.
; Changing the value to 10 or higher in parameter R57 means that
; this content is executed.
$ENDIF
![]() Please note! An IF statement within another IF statement is not supported (see table below).
Please note! An IF statement within another IF statement is not supported (see table below).
| WRONG | CORRECT |
|---|---|
| $IF R200==0 ; G-Code: Contents $IF R1==1 ; G-Code: Contents $ENDIF ; G-Code: Contents $ENDIF | $IF R200==0 ; G-Code: Contents $ENDIF $IF R1==1 ; G-Code: Contents $ENDIF |
Complete G-code example
Now that we have learnt about programming subroutines, loops, R parameters and IF statements, we will expand our example to include these commands.
Our G-code then looks like this:
; G-code file: Production of a rectangle on 15/01/2024
; Update on 23.01.2024
R3=3 ; Set the number of passes in Y
R4=4 ; Set number of runs in X
R5=110 ; X Shift for new sub-programme set
R6=110; Y Shift for new sub-programme set
R7=1 ; Specify whether a circle is to be created, 1 - yes, 0 - no
; Tool number 1 is selected
T1
; Lift the tool at rapid speed to the height Z = 10 mm above the zero point
G00 Z10
; Move to position X = 10 and Y = 10 at rapid speed
G00 X10 Y10
; Switch on the work spindle with M3 at a speed of 2000 rpm
M3 S2000
; Wait 5 seconds until the spindle speed is reached
G04 H5
; Relative dimensioning (incremental dimension) is activated
G91
; Assignment of the value via parameter R3
G25 Q=R3
; Assignment of the value via parameter R4
G25 Q=R4
P1 ; Subprogramme 1 is called up
G00 X=R5 ; Relative displacement, defined in the R5 parameter
G26
G00 Y=R6 ; Relative displacement in X, defined in the R6 parameter
G00 X=-R5*R4 ; Relative displacement in X to starting position
G26
; End of programme
M5 M30
; Start of sub-programme 1
M99 P1
$IF R7==1
; Move to the centre of the rectangle
G00 X50 Y30
; plunge 2 mm into the workpiece at a feed rate of 600 mm per minute
G01 Z-12 F600
; Circle (d=20mm, centre 60×60) clockwise
; travelling at a feed rate of 600 mm per minute
G02 I0 J20
; Lift tool at rapid speed : Z = 10mm above the zero point
G00 Z12
; Move to position X = 10 and Y = 10 at rapid speed
G00 X-50 Y-30
$ENDIF
; plunge 2 mm into the workpiece at a feed rate of 600 mm per minute
G01 Z-12
; Traverse rectangle 100×100 mm at a feed rate of 600 mm per minute
G01 X100
G01 Y100
G01 X-100
G01 Y-100
; Lift tool at rapid speed : Z = 10mm above the zero point
G00 Z12
M99 ; End of sub-programme 1
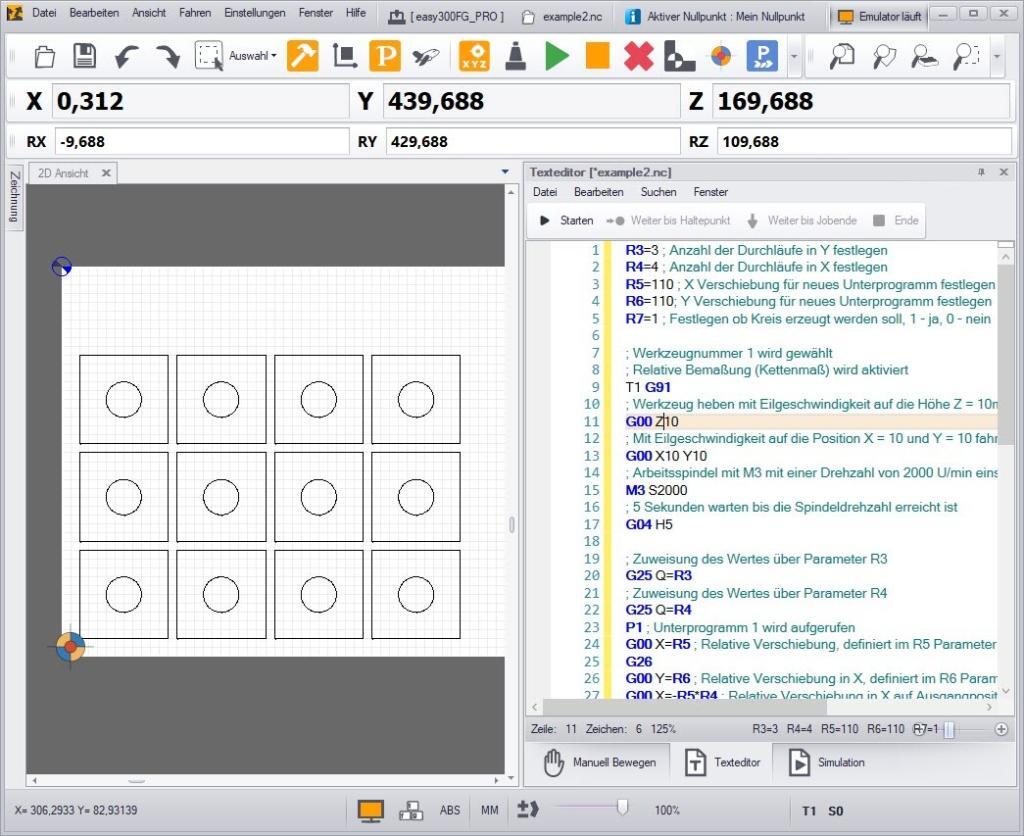
Several R parameters, loops and IF statements are used in the G code (see above). The G-code file can be changed very easily using the R parameters. The R parameters R3 and R4 define the number of parts in X and Y. The R parameters R5 and R6 determine the distance between the parts in X and Y, and the last parameter, R7, defines whether a circle is to be output or not (see IF statement in the subroutine).
Summary
In this blog article, we have looked at the various facets of CNC programming. Starting with the basics, which are explained in the article
‚CNC programming: Learn G-code - Quick and easy‚ to advanced topics such as R parameters, loops and IF statements. We have thus covered the breadth and depth of CNC programming.
We hope that this blog article will help you to achieve the desired success.
Yours sincerely, Your BOENIGK-electronics Team